DVWA Complete Walkthrough
A complete (more or less) walkthrough of the Damn Vulnerable Web Application (DVWA) for security testing and learning purposes.
To further your understanding of DVWA, browse the full DVWA series to master every vulnerability level.
All testing shown in this series is performed locally against DVWA, an intentionally vulnerable application.
Do not apply these techniques to systems you do not own or have explicit permission to test.
Introduction
What’s this?
Damn Vulnerable Web Application (DVWA) is a PHP/MariaDB web application that is, as the name suggests, intentionally vulnerable. Its main goal is to help security professionals test their skills and tools in a legal environment, assist web developers in better understanding how to secure web applications, and aid both students and teachers in learning about web application security in a controlled classroom environment.
The aim of DVWA is to practice some of the most common web vulnerabilities, across various difficulty levels, using a simple and straightforward interface. Please note that there are both documented and undocumented vulnerabilities in this software. This is intentional, and you are encouraged to try to discover as many issues as possible.
This series documents my walkthrough of DVWA modules, explaining how each vulnerability works, why it exists, and how it can be exploited across different security levels.
Security levels
The DVWA server has four different security levels, which can be configured from the DVWA Security menu:
- Low: This security level is completely vulnerable and has no security measures at all. It’s use is to be as an example of how web application vulnerabilities manifest through bad coding practices and to serve as a platform to teach or learn basic exploitation techniques.
- Medium: This setting is mainly to give an example to the user of bad security practices, where the developer has tried but failed to secure an application. It also acts as a challenge to users to refine their exploitation techniques.
- High: This option is an extension to the medium difficulty, with a mixture of harder or alternative bad practices to attempt to secure the code. The vulnerability may not allow the same extent of the exploitation, similar in various Capture The Flags (CTFs) competitions.
- Impossible: This level should be secure against all vulnerabilities. It is used to compare the vulnerable source code to the secure source code.
Prior to DVWA v1.9, this level was known as ‘high’.
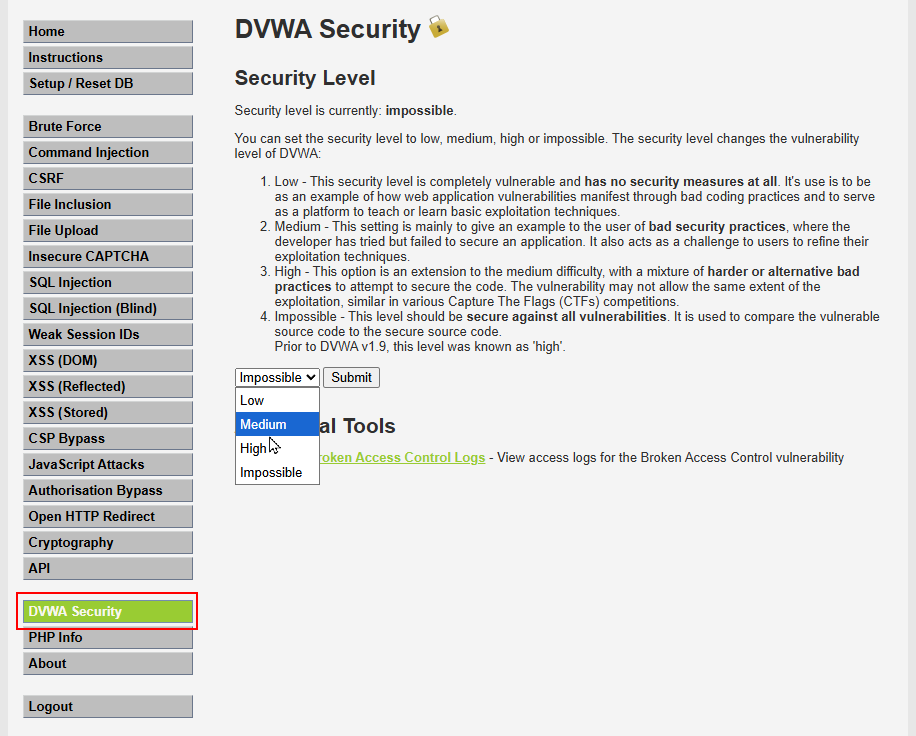
In this series, we will only cover the first three security levels.
Who is this for?
This walkthrough is aimed at:
- Students learning web application security
- Pentesters and red teamers refreshing fundamentals
- Anyone preparing for labs, certifications, or interviews
Basic knowledge of HTTP, HTML, and JavaScript is assumed.
How to use this series?
- Each module is documented independently
- Modules can be followed in order or referenced individually
- Payloads and screenshots are provided for clarity
- Small differences may appear depending on browser or tool versions
Installation
For this lab, I installed and used DVWA v2.5 with Docker. The setup is pretty straightforward, but I made a couple of changes so the application could be accessed from my local network, as I wanted to attack it from different machines.
Download DVWA, either by downloading the ZIP file or using Git:
1
git clone https://github.com/digininja/DVWA.git
Inside the DVWA folder, modify the compose.yml file. Specifically, update the port binding:
1
2
3
4
5
6
7
8
services:
  dvwa:
    build: .
    image: ghcr.io/digininja/dvwa:latest
    # [...]
    ports:
      - 0.0.0.0:4280:80 #Modified: 127.0.0.1 -> 0.0.0.0
    restart: unless-stopped
The virtual machines I used were configured in bridge mode, allowing them to access the local network.
- As I am using Docker Desktop, from a terminal inside the DVWA folder, run:
docker compose up -d - Navigate to
http://<your_ip>:4280/login.phpand log in using the default credentials:admin:password - On the first login, you will be redirected to a
Database Setuppage. Scroll to the bottom and clickCreate / Reset Database.
That’s it, you can now log in and start playing!
Do not upload it to your hosting provider’s public html folder or any Internet facing servers, as they will be compromised. It is recommended using a virtual machine or environment, which is set to NAT networking mode.
Modules Walkthrough
- Brute Force
- Command Injection
- Cross-Site Request Forgery (CSRF)
- File Inclusion
- File Upload
- Insecure CAPTCHA
- SQL Injection
- SQL Injection (Blind)
- Weak Session IDs
- DOM Based Cross Site Scripting (XSS)
- Reflected Cross Site Scripting (XSS)
- Stored Cross Site Scripting (XSS)
- Content-Security Policy Bypass
- JavaScript Attacks
- Authorisation Bypass
- Open HTTP Redirect
- Cryptography
- API Security
References
- DVWA official GitHub
- PortSwigger Academy
- CryptoCat DVWA walkthrough series
- Charalampos Sapnias blog
- AI (Perplexity, ChatGPT, local AI models, etc.)